Welcome!

Hello and welcome! I would love to share with you my love of paper crafts, altered art, mixed media, card making, scrap pages and fun! Come right in, sit right down, have a cup of your favorite beverage and relax!

Saturday, February 4, 2012

Masculine cards for a swap

Here are some cards I made for a Masculine Card Swap on SCS.


Sure had a fun time making! I used several Cricut cuts from the Heritage cartridge. I also used the Cricut Imagine cartridge JT. It has a nice steampunk feel to it. I chose several masculine papers and Heritage cuts that looked masculine. Some of the labels are from the Heritage cartridge too.

CTMH Giveaway from My Passion for Scrapbooking

A cool giveaway is going on at http://www.mypassionforscrapbooking.com/browse-65008/Giveaways.html
I sure would love a chance for this too, but if you are here you need to check it out too! Its for the Art Philosophy Cricut Collection cartridge! I've been drooling over this cartridge for awhile! You might be too!
Cool blog btw too!

Saturday, January 21, 2012

Masculine Birthday Card

Birthday Card I made for my son. For this card, I used some Tim Holtz embossing folders, and inked them two different ways. For the car in the top left, I inked inside the folder first before embossing the cardstock. The gears and the car in the bottom right, I inked after I embossed them. The Birthday sentiment is a studio 112 stamp. Tied a black cord around it. Background dp is Stella Rose from My Minds Eye.

Sunday, September 18, 2011

Magic of Oz with Graphic 45 papers


I fell in love with these marvelous papers from Graphic 45's The Magic of Oz. I found this paper box book form at Hobby Lobby, plain. I then took some choice pieces of the Magic of Oz sheets and collaged the pieces outside and inside my faux book. I did several things to make my book unique. I made a packaging tape transparency of Dorothy. To do that, you take clear packing tape ususally about 2 inches wide, and simply lay it down firmly on top of the selected image. I used two strips of packing tape and taped over Dororthy so no part of her was not covered. I then burnished it on firmly by taking my bone folder and applied pressure to the image to make sure it was air tight on the tape. Then I dropped the image in warm water and let it set for about 2-3 minutes. Then I gently rubbed of the backing the pulpy paper will rub off with your thumb and fingers. Rub off the pulp until you see through and oila! A very cool transparent image! I then made sure it was dry, and even took my sanding block and gently sanded off any little paper shreds. You must be careful not to rub off the image, just rub off the paper backing. I have done this a few times before, and what's neat about transparent images is that you can lay them on other paper and that paper will show through just enough to entice you to look closely. It's a lot of fun too. I put the transparent image on a clear acetate sheet, and adhered another Graphic 45 newsprint from the Magic of Oz series as a clear page for the book. I taped the clear page on with clear transparent regular tape. I thought it would be neat to put one of those cute battery operated tea lights inside since I have a transparent page, but the light is a little weak to totally get the effect of the transparent image. 
For the outside of the book, I used black linen cardstock. It totally looks like an old book cover. I just trimmed it in gold trimming I found at Red Lead. It was a fun project, and it definitely qualifies for altered art. One of my other crafty things I like to do! Hope you enjoy!

Wednesday, August 10, 2011

Tim Holtz distress stained Happy Birthday!

A new card using Tim Holtz Ranger Distress Stain dobbers. For this flower, I used Walnut Stain and Broken China. The hemming lace is stained with Broken China. The frame is a Cricut die from the Cindy Loo cartridge. The yellowed ledger paper is from Stella Rose. The patterned paper is from my Cricut Imagine More cartridge. The rusty gold embossed paper is a piece I found at Hobby Lobby a few years ago. The music paper was from my stash, and I tore it and stained the edges with walnut stain. Used a rosette flower found at Michael's as the center of the TH flower. Happy Birthday sentiment is from Hampton Arts. I did stitch around the edges with my Janome Sew Mini. Card is for a very special person, my MIL!

Saturday, May 21, 2011

A special Thanks!

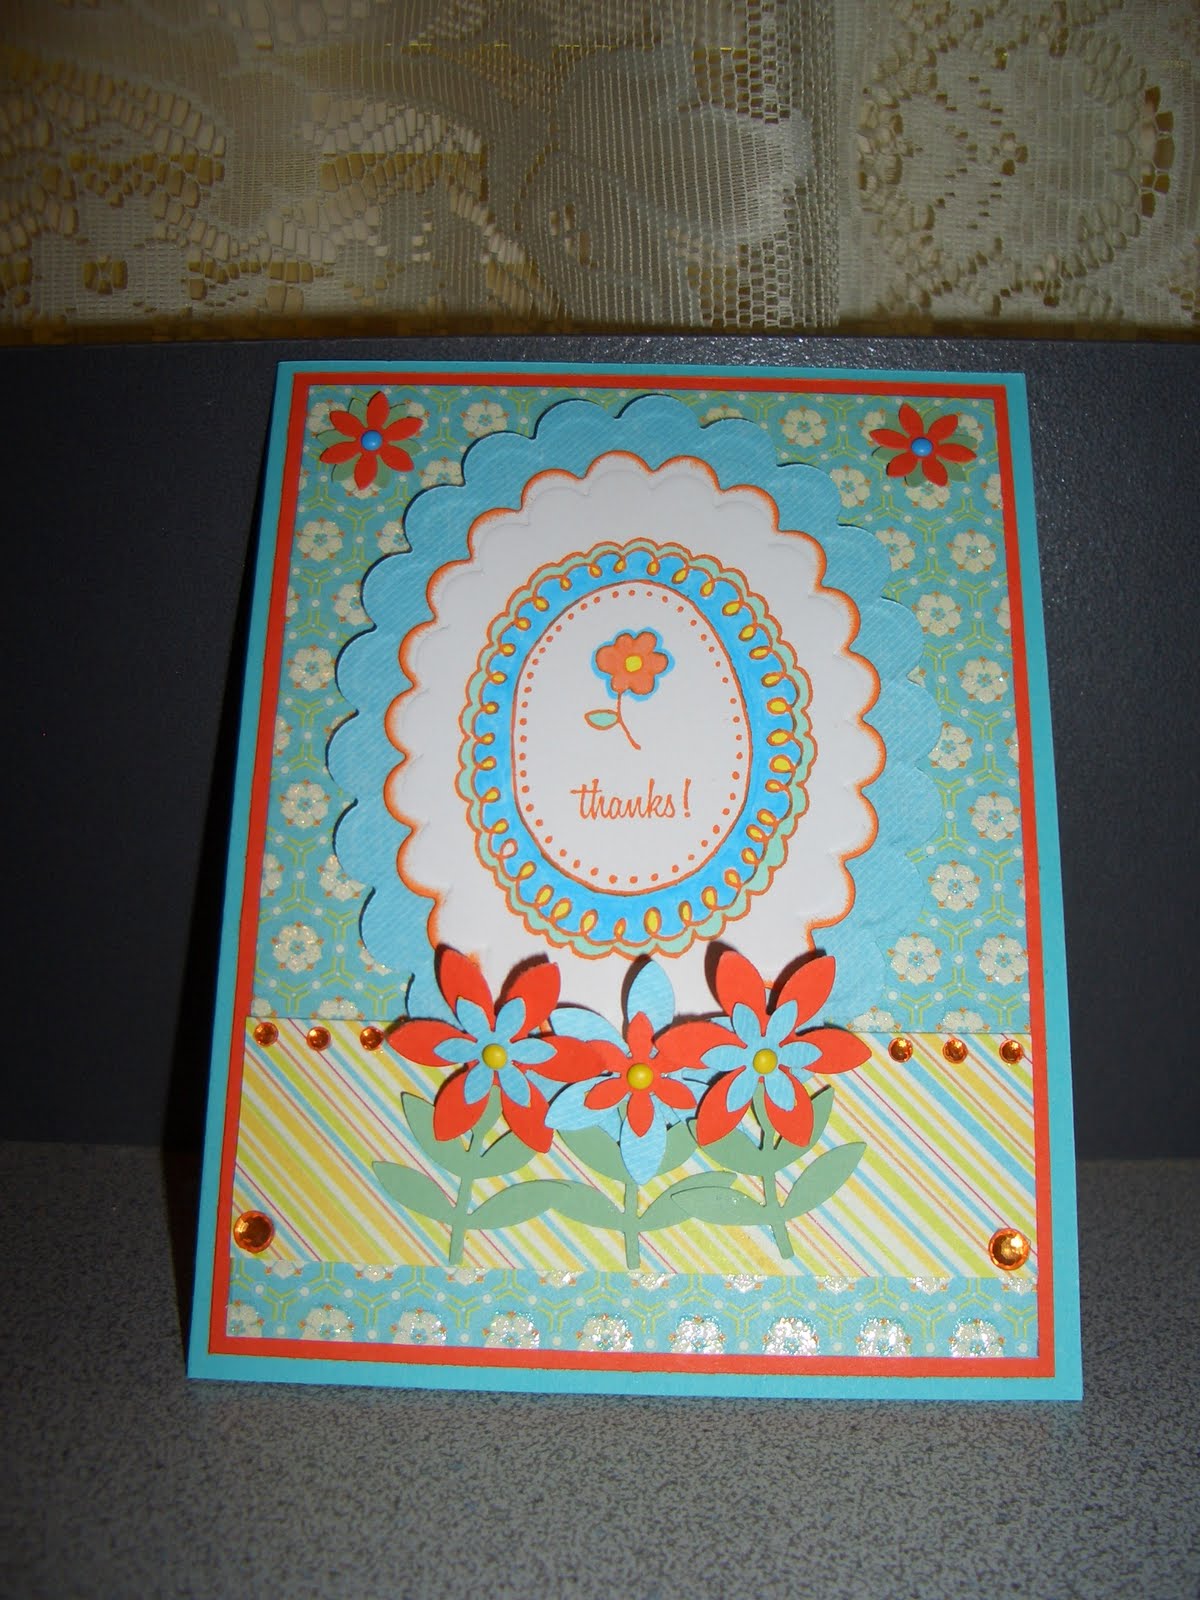
This is a Thank-you card I made for a special friend! The designer paper is Citrus from K&G paper company. The image is a Studio G clear stamp I found at Michael's. I used copics to color in the image. I used scalloped Nesties to frame the image. I sponged orange die ink around the white scalloped frame, and them nested it inside the blue DP from the Citrus paper pack. I lifted the image with foam dots. I used paper flower punches and MS leaf frond punch for the flowers where I only glued the stem to the paper and let the flower tops rest on the lifted scallop frame. Each flower center has a mini brad. I then used jewels on the strip of striped designer paper. The card base is a bazil aqua plain cardstock. Simple but sweet!

Gruffies Birthday using Copics

This is a card I made for a certain little girl for her birthday. I am fairly new with Copics coloring. I do love to color with them! The ribbons were a little time consuming but fun. When I was done coloring in, I used Labels Eight to frame the image. Then I took the Terrifically Tacky Red tape and lined the edges of the back and then took this pale blue-green ribbon and tucked it and bunched it and made this ribbon ruffle around the frame. Then I simply used K&C designer papers as the background for her card. Fun and Sweet! Just love these Gruffies images! I got this one from my friend Julie from her online shop Scrapbook Store at your Door! Happy Birthday to my little someone special!

Sunday, May 8, 2011

MIL Tray, Printers Tray altered for gift!

This is another view of the same tray. The first pic I took outside and this one I took inside.
Lots of fun! Details are in the post below this one!

For my Mother In Law on Mother's Day

I made this altered tray for my MIL on Mother's Day. It's a 7 Gypsies tray, that I did a quick white wash over. I selected several designer papers from 7 Gypsies, and several others. The trinkets I have been collecting awhile, but some are Tim Holtz, some are Bo Bunny, some are Making Memories, and some are from Red Lead, a specialty shop in Webster Groves, Mo. Some items are some things I had from my grandmother's sewing kit, like the white button where I put glitter in the middle. The spoon is one of my favorite items. I made this during a St Louis Splitcoast stamper's swap where our theme was altered items. I knew it would make a good feature on an altered tray! I also made the zipper roses, where I found the tutorial on one of the many blogs I visit, sorry I can't remember which one, but thanks for this cool idea! I also made the hemming lace flower by bunching up the lace in a gathering and stitching in place. I used some Tim Holtz bottles and typed Nehi Time in one and just the word Time in the other. I got this idea from the Tim Holtz website, when Tammy Tutterow showcased her beautiful tray. I simply had fun putting this together from finding the pictures of my Mother in law when she was young. Her sister helped by sending pictures to me in secret! So much fun to work with these fun photos! I wasn't afraid to cut the cute photo of my MIL when she was young in pigtails with a bottle of Nehi Orange Pop in her hand! I really liked putting all four pieces in each of those four frames. I also took another photo of her after she had her baby--now my hubby! The photo is cut in two pieces and centered in two frames. It contains her father and mother. The cute little framed picture of the four kids is my MIL second from the right, her sister and two brothers. I really love their wedding photo, they are still together after 55 years! Amazing! Still going strong! I had been thinking of doing this for quite awhile, and have gathered trinkets and collectables for a long time. These collage frames are really fun to do and the recipient was very happy with her Mother's Day gift!
Happy Mother's Day to all the wonderful hard working mothers out there! Hope your day was beautiful!

Saturday, May 7, 2011

My First Award! from Julie at: http://designs-by-julie.blogspot.com/


The Liebster Blog award is given to bring newer blogs into the light. 
It's a great way to share blogs that might not otherwise have been noticed and should be! As recipient you must share the love and pass it along to others, as well as these four things:

1. You must post on your blog and tell a little about the award and
announce your 3-5 picks.
2. Let those know you have chosen them.
3. Copy and post the award on your blog for all to see.
4. Have fun and continue to inspire

The 5 recipients I have chosen for this award are, in no particular order...
1.  http://serenitylanedesigns.blogspot.com 
2. http://ariiaana.blogspot.com/
3. http://www.shareyourgifts.blogspot.com/
4. http://lastampers.blogspot.com/
5. http://ogilviesfollies.blogspot.com/

I chose these blogs because they are new, and they offer some great ideas, and have fun things to see. 
I wish to thank Julie who visited my blog and simply offered this neat award! I hope to post a new project soon!