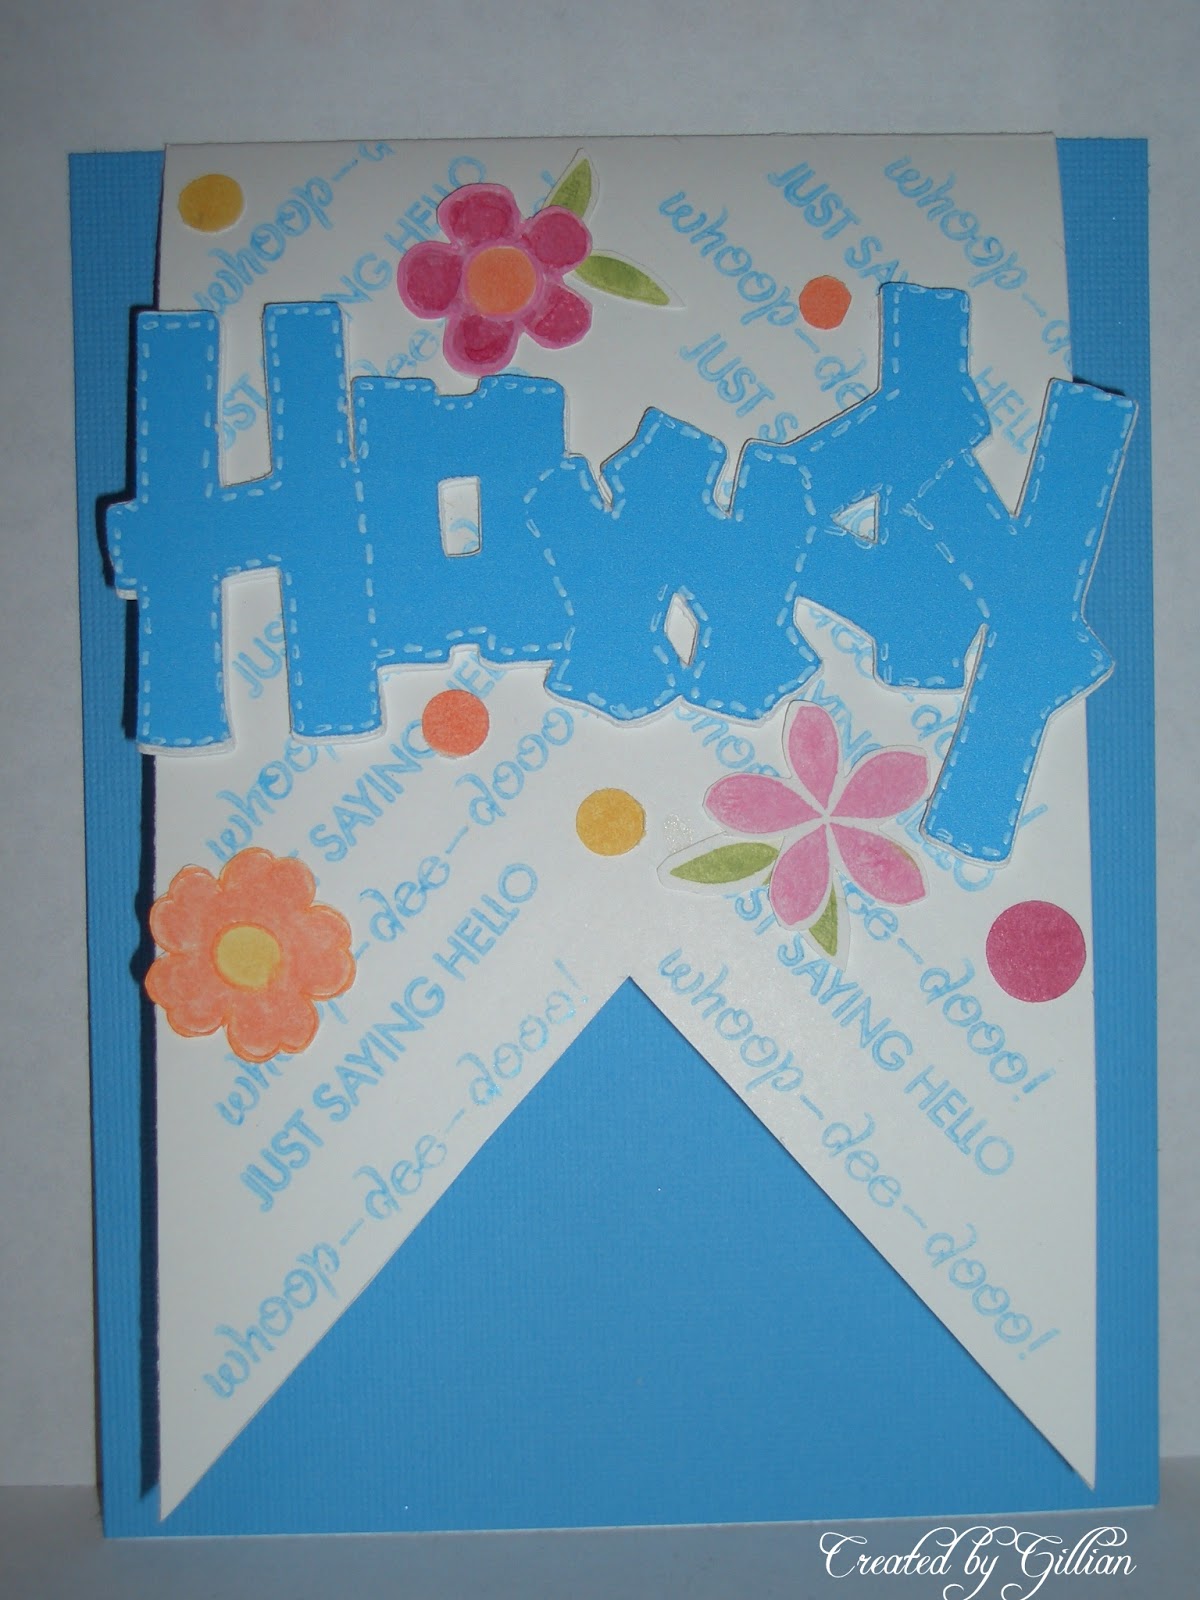
I made this card for Onlinecardclass.com.
I used my Cricut to make the sentiment using the color RBG codes of my Cricut Imagine and cut the word Howdy out from the Old West Cartridge. I then cut out the same word five more times using white card stock and stacked them on top of each other to make a thicker, popped up sentiment. This was a technique from the onlinecardclass,.com
Then the next interesting thing was marking the card every half inch and stamp sentiments in a chevron style for the banner background. That was cool too. Then the banner is sandwiched inbetween the blue card base and another white card base of the same size (4-1/4 x 5-1/2). Then flowers and leaves are used in the class theme colors and added as embellishments. An inside sentiment is stamped in Versa Mark and white embossing powder is heated to create a nice white sentiment on the blue card base. More flowers added as embellishments. My inside sentiment simply states: Thinking of you today and smiling.
Fun card!
A place to explore crafting with paper, altered art, mixed media, vintage, new ideas, frugal ideas and general fun with designing or creating paper art!
Welcome!
Hello and welcome! I would love to share with you my love of paper crafts, altered art, mixed media, card making, scrap pages and fun! Come right in, sit right down, have a cup of your favorite beverage and relax!
Wednesday, July 10, 2013
Sunday, July 7, 2013
Cards for fun, July and a challenge!
The first four cards here are from a card class my friend Katherine Anderson held. At the last minute, I had to go on a business trip and missed the class! However, Katherine saved all the cuts and I finished the cards at home. These cards are from StampinUp's Best of Flowers stamp set. These are some examples of what can be done with this set! Lots of fun!
The fifth card is a Victorian style vintage card I tried to make totally girly. I like to look at these beauties, but sometimes I have a hard time doing them! So I made myself go outside my box and attempted it. The image is one I found on free Printables in Pinterest. On my Pinterest board, under Printables, you will see the link to where this image is credited. She's so pretty! I love the Music Paper background it was printed on. I simply chose this image and printed it on card stock from my Epson printer. Then I incorporated the image with lace (three kinds)! Seam bindng lace, the little pom lace and some pretty lace I found at Hobby Lobby the other day. I added some pearls and aged some papers by sponging them, and then added the heart locket trinket. My next attempt I'll try to add more textured layers!
The bright red white and blue card was inspired by this card: http://www.cardscraps.com/blog/2013/07/04/happy-4th-with-six-sided-sampler/
but I didn't have the hexagon shapes. Her card is so beautiful, I kind of cased it but made the changes using a 1 inch square punch instead.
The last card is for a new online class I signed up for. Today is the last day to enter the Pre-Class challenge 2, and I thought I'd try it! I had fun stitching and sponging this card for the challenge.
Sunday, May 26, 2013
This gentleman is ultra cool! I just love how he looks, secretive, smart and sexy in a handsome steampunk kind of way! This is from the Tim Holtz Time Traveler's Blue Print stamp set! I just love it! These guys are are just the ultimate in cool! I used Bazzil Almond Cream as the base to stamp the image in Distress Walnut Stain ink. Then I simply colored in the image with some Copics markers. I also stamped the stack of suitcases in Walnut Stain inks and colored that image in with Distress inks and a water color brush. I found some Bo Bunny timepiece paper and distressed the edges. I used the Tim Holtz ticket Soar in the corner and sponged around the edges with Distress Walnut Stain. I used a single Tim Holtz gear and a timepiece trinket I had in my stash. I tried to stain the timepiece trinket a little with Distress inks as it was a little too gold and bright at first.Then I simply popped up the images with some sponge pop dots and it is done!
This is one cool dude! I fell in love with the Tim Holtz Time Travelers Blue Print stamps the moment I saw them! These guys are just too cool! These images really make me wish I could travel back in time and meet them! Even work with them in some kind of spy or subterfuge in a steampunk secret mission! For the Good of course! This is the first image I worked with. I simply stamped in Momento Brown ink and then colored him slightly and lightly with a barage of tans and beige Copics markers. I polka dotted the background with the same Copics markers. The frame is a Sizzlets frame set where both edges cut so you have an immediate framing of your desired image. I used Bazzil almond cream card stock for the stamped image, and Bazzil chocolate truffle for the frame. I stamped the gears in the background from this Time Traveler's stamp set. Just love how cool this guy looks!
Sunday, August 5, 2012
It's Just a Number
This should make a nice masculine card for a guy turning an age he may not really want to be! So I had these cute distressed papers that had numbers all over them. I also used the Tim Holtz Ranger numbers and sanded them a little and then added some Pearl color and some Ranger Distress crackle paint to age them. I also covered 3 chipboard numbers with some number paper and stained the edges with Ranger Distress walnut stain. I colored the 687 numbers with some Baja breeze ink and also used some distress crackle on top of that. The center statement of It's Just a Number is done with a Dynamo letterer. I distressed and stained the almond cardstock where I placed the Dynamo letters. I added Clear Distress Crackle over the statement piece. Card is covered in a Wood Designer paper, but the numbers cover it up pretty well! LOL!
Kute little Koala
This is a cute little stamp from Whippersnapper. I had quite a few scraps of paper on my desk, so I just grabbed some older designer papers and cardstock and used up some paper stash to create this cute little Koala Birthday card. I used Copics to color him in. I had a little thumb punch of a cupcake so I used the same striped paper to punch out the cupcakes on the side. I also sort of followed an older SCS card sketch for the placement layout. Faux brads are used in the corners by using a very old industrial paper punch my DH gave me quite a few years ago. It was another fun one!
Sunday, July 29, 2012
Hi Y'all! Here is a selection of Birthday cards I've been working on. This first one is done with a selection of Kraft Core colored cardstock. I then used a border punch and stained all the edges with Ranger's Distress Ink Walnut Stain.
This second one I just tried to bring out the colors of the stripes by using the purple cardstock, purple and orange Prima flowers, and an orange scallop around the sentiment.Here on this third card, I just loved the blue and yellow color combination and highlighted with the orange Prima flower centers and orange scalloped circle.
This fourth and fifth card I just liked the Pinwheel designer paper which I highlighted with little gems in the centers. I used a Baja Breeze ink and sea colored cardstock and tried to pop it with orange and red.
For these last two, I found this cute aqua cardstock and turquoise aqua designer paper, and I used an old Splitcoast card sketch with the large diamond square with three smaller diamond squares accenting it. I used a combo of Aqua and Baja Breeze, and it looks better IRL (in real life) than it does in these photos.
As always I just have fun making cards!
Monday, July 23, 2012
Mixed Media on Canvas
Here is one of my first attempts with mixed media on canvas. A while back a friend of mine sent me a link to Christy Tomlinson's She Art blog. You can view it here. I certainly love her style. She makes it look like so much fun. I had to try it. I think I like how it turned out. I have a lot to learn yet, but this was tons of fun. So much so I want to do it some more!
Then this one in the center, with the larger butterfly,
Then this one as the last placement.
These were done using designer paper, acrylic paint, light modeling paste mixed with some acrylic paint, and some rubber stamps and punches. I used all kinds of stencil templates to add the modeling paste. You can tell I obviously tried to do a few things that Christy shows how to do in her tutorial. It was just fun to do!
This one may be my first in placement on the wall,
Then this one as the last placement.
These were done using designer paper, acrylic paint, light modeling paste mixed with some acrylic paint, and some rubber stamps and punches. I used all kinds of stencil templates to add the modeling paste. You can tell I obviously tried to do a few things that Christy shows how to do in her tutorial. It was just fun to do!
Saturday, June 30, 2012
I tried this idea after viewing Gina K.'s blog. I liked how she trimmed the scalloped die cut at the edge of the paper. You can then use a rather large stamped image and trim it to fit your A2 size cards. You can use any style diecut, such as a Spellbinder's label's 8 or Labels 4. Just fit it at the edge and trim it! This style is nice to make because there are not too many layers so it mails nicely in a regular A2 invitation sized envelope. I still always put a card protector piece of cardstock over the card so it goes through the mail machines smoothly.
I love this sunburst style card! It is such a great way to use coordinating papers! The sunburst pattern is from a blog a friend referred to me. Here is the link:Sun Burst Card Template © 2012, Andrea Walford, Paper Crafter’s Library; www.papercrafterslibrary.com
Andrea has a great tutorial on how to piece this together so it comes out so nice on your card! You can choose any occasion, any sentiment and any color to make it your own. I have used all sorts of colors using this pattern, and all kinds of sentiments to fit the occasion of the card I choose to make. It makes such a bright, beautiful card!